
 Today I am sharing a Shaker Card that I made using the Embellished Ornaments stamp set from Stampin’ Up for my upcoming Christmas in July Class! Since Stampin’ Up! has come out with the new Foam Adhesive Strips (141825).
This card was inspired by this week’s Mojo Monday sketch. As soon as I saw this sketch I thought of a shaker card! When I saw this sketch I thought of two potential shaker cards. One with a Christmas ornament and another with a large flower such as a Dahlia. If I have time I will make the Dahlia card later this week.
Anyway – the details for this card:
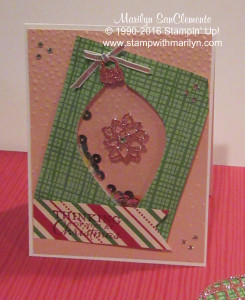
Card base: Whisper White cut to 4 1/4″ x 11″ scored at 5 1/2″. The background layer is a piece of Blushing Bride cardstock cut to 5 3/8″ x
4 1/8″. I embossed this layer with the Softly Falling embossing folder. Attach this layer to the top of the whisper white card base.
Next I used a piece of the This Christmas Designer Series paper for this Christmas project. I choose the garden green plaid paper cut to 3 1/4″ x 4″. I used the long thin ornament from the Delicate Ornaments thinlits that match the Embellished Ornaments stamp set to cut an ornament shape out of the designer paper. I used my handy Fast Fuse Adhesive to attach a 2 3/4″ x 3 3/4″ piece of a window sheet to the back of the ornament. This is what will hold in your shaker items.
Next I used the new Foam Adhesive Strips to outline the ornament on the back of the piece over the window sheet. I used sequins that I pulled off of the Stampin’ Up! sequin pieces. I used a mix of Blushing Bride, Silver and Gold Sequins. I used several dimensionals on each corner of the square to hold the edges of the piece down. This piece is applied to the front of the card on a diagonal. Next I cut a small poinsettia and an ornament topper from a scrap of Blushing Bride Glimmer paper. I tied a small piece of the 3/8″ silver ribbon thru the ornament topper and used a dimensional to attach it to the top of the ornament and the fine tip glue pen to glue the poinsettia on the front of the ornament. 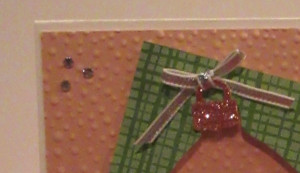
Next I cut a 1″ x 3″ piece of t he diagonal stripped designer paper. I stamped the message “Thinking of you at Christmas” with Cherry Cobbler ink and embossed it with Clear embossing powder.
Last but not least is the bling! I randomly added sets of 3 Rhinestone jewels around the edge of the card to look like snow.
Here is a video that I made showing how I made this Shaker Card:
Product List


Did I mention that pink and green is my favorite non-traditional Christmas Color combination. What is yours?

Totally fun shaker card!! Love it. Thanks for joining us at Mojo Monday.