
Today I am sharing a couple of ideas on how to make Shabby Chic Backgrounds. The definition of Shabby Chic is an item that has a pleasantly old and slightly worn appearance. There are many different ways to apply Shabby Chic to paper crafting projects. Many people like to “age” their paper with tea or coffee. Today I am sharing a couple of quick and easy way to get that shabby chic look using scissors, ink and torn paper.
Below is a video that shows how I used the techniques to make these cards.
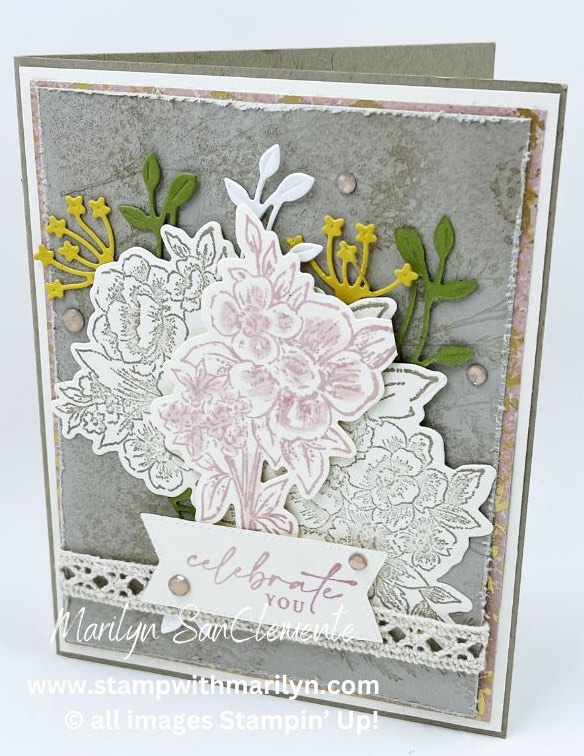
Abigail Rose Shabby Chic Card

The first card uses the Stampin’ Up! Abigail Rose stamp set. I like the antique hue of the roses with the outline of the Rose images that are part of the Abigail Rose stamp set. Colored in, these roses look like antique wall paper that you see in old New England houses! The leaves and flowers behind the roses are cut using the dies from the Dainty Delights bundle.
I used a piece of Crumb Cake Cardstock for the background. This piece is distressed by stamping the ferns from the Stampin’ Up! Nature’s Print bundle. The images are stamped using Crumb Cake ink on Crumb Cake CS. I then used a sponge to blot on Crumb cake ink and add to the distressed background.

I distressed the edge of the Crumb Cake CS by using my scissors to fray the edge of the CS. This is layered on a piece of Season of Chic Blushing Bride Designer paper and then on a piece of Very Vanilla Cardstock with a Crumb Cake base.
I lightly colored the top smaller rose bundle with Blushing Bride ink to highlight this as the focal point of the card.
Typically Shabby Chic cards have a lot of layers to highlight the colors of the design. Lastly is a layer of crocheted lace trim. The Elegant Faceted Gems add a nice touch to bring out the blushing bride color.
Dainty Delights Shabby Chic Card

I made the second card with the Dainty Delight Bundle with the FREE Dainty Flowers Designer paper that is available during Sale-a-bration!
With this card, I wanted to show how to distress the background of pre-printed Designer paper. I used a sponge to brush Blushing Bride Ink over the background of the image.
The Dainty Flowers Designer paper is mounted on a piece of Rich Razzleberry CS. This is then mounted on a piece of Blushing Bride CS that has been distressed by tearing the edges of the paper and then using Crumb Cake Ink along the torn edge.

The floral images are stamped with Momento Black ink and colored with Blends markers. I used a few Iridescent Pearls to add an additional touch to the card! The card is finished off with a bow made out of Vanilla Linen Ribbon.
This is a video that shows how I distressed the two cards.
Thank you for stopping by today and checking out my Shabby Chic Cards!

Love the Dainty Flowers bundle and Designer paper? Purchase the Bundle (stamp set and dies – 160675) and select the Dainty Flowers DSP for FREE as your Sale-a-bration gift (160834) . But Hurry since Sale-a-bration ends on Feb. 28th!
Ready to place an order? If you are in the US, I would love to help you out! If your order is under $150, use the Host Code 2MVPQQ2S and I will send you a package of embellishments! If your order is over $150, then keep your own host benefits! I love to share the benefits with my customers! CLICK HERE to place your order!
Happy Stamping!
Marilyn
Am I allowed to print off any of your instructions?
Yes definitely!! That’s why they are there! Enjoy and have fun with it!
Marilyn